- Guides /
- Mastery Guide - Somniloquium Serenum (Ave Mujica Collab)
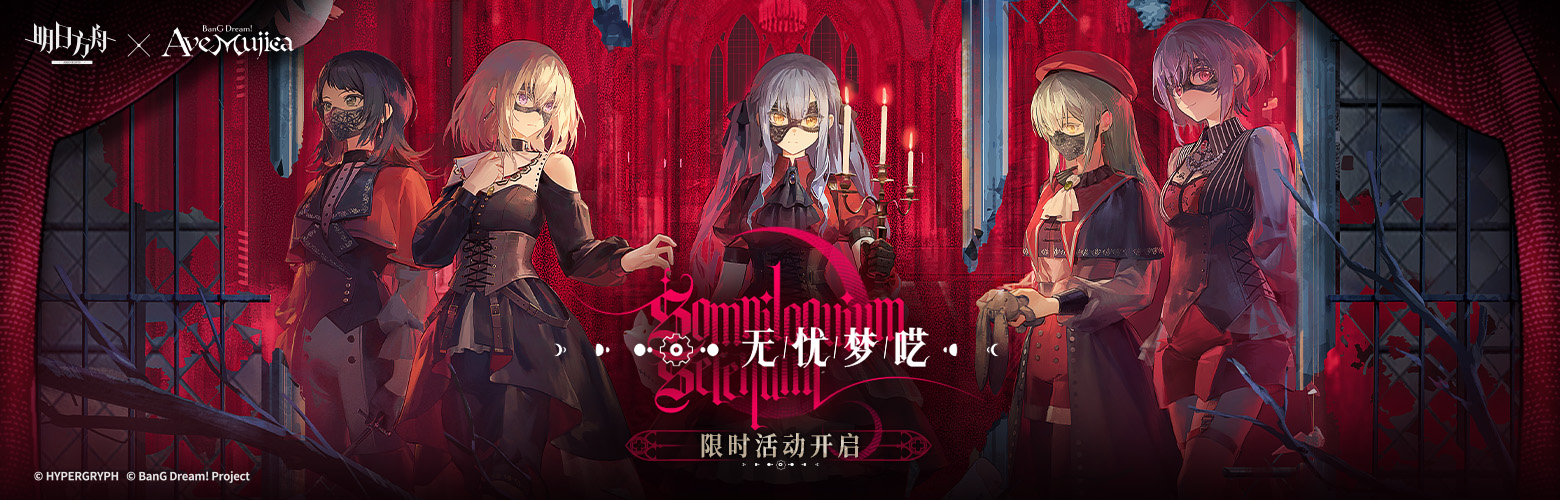
Mastery Guide - Somniloquium Serenum (Ave Mujica Collab)
A guide to the best Masteries available in the Somniloquium Serenum patch, as well as discussion of the units and other game related topics.
 TacticalBreakfast
 - Introduction
- Announcements
- Talos Pioneers!
- Sanity;Gone Version
- Should You Pull?
- FAQ and Discussion
- Q: Can you expand a little bit on the “just a DPS unit” idea that’s come up a lot with Sakiko?
- Q: Related, why don’t you value the DEF/RES-ignore more?
- Q: How does Fever work?
- Q: How does the spark / guarantee work?
- Q: I can’t keep track of who is who!
- Q: How should I handle the “promote 5★s” event?
- Q: How good are the 5★s? Are they must-raise units?
- Q: Where are the Module thoughts?
- Q: Any thoughts on Ave Mujica or the collab itself?
- Masteries for Somniloquium Serenum
- Sakiko Togawa
- Mutsumi Wakaba
- Uika Misumi
- Umiri Yahata
- Nyamu Yūtenji
- Pull Priority
- Pull Priority Blurbs
- Lookaheads
- Titi
- Perfumer the Distilled
- Varkáris
Introduction
Oh boy, no shortage of content lately, huh? Endfield, CC, the three week Ato event, HCM, then directly into Ave Mujica. I’ve barely had time to actually write! Quite the shame too since I have so many spanking fic- err, I mean guides to write. Anyway, there’s a lot of talk about this patch, so let’s get into it.
As always, you can find the full Mastery guide here.
Announcements
Talos Pioneers!
With Endfield now in full swing, I am again shilling a fan project that I’m a big fan of, Talos Pioneers. It intends to serve as a hub for blueprints in Endfield. While building your own bases is great fun, it’s not for everyone, and sometimes it’s helpful to find an efficient layout for solutions you might have missed! So I highly recommend checking it out if you intend to play. It’s designed and run by some cool people you’ve probably heard of already if you’re regulars in the community, and lots of new features are coming out soon, so be sure to add it to your bookmarks!
(FYI I am not directly involved with Talos Pioneers beyond occasionally shitposting in the dev channel, although I may write some content for it in the future.)
Sanity;Gone Version
Welcome to the Sanity;Gone version of the Mastery Guide! Why is this here you may be wondering? Is LD going away? Thankfully not (yet), but when GP crashed I was homeless for a while. I’ve always done this guide for love of the game and to be helpful, so it just makes sense to spread my footprint out. S;G has a more active development team too, plus better integration with kits and skills, so it’s a match up that works well!
For the foreseeable future, I’ll be publishing the article updates here, on LD, and on Reddit, and all will be linked off the the main Google Sheets guide here. I hope you’ll enjoy whichever you choose to follow.
Should You Pull?
Yes. Sakiko is a very strong DPS unit on a very valuable banner. While SilverAsh the Reignfrost and Pramanix the Prerita are more valuable, Sakiko isn’t too far behind. She has incredible range and some powerful mechanics with her DEF/RES-ignore and Fever that make for a top-tier overall unit.
Further, she’s a collab unit. While a rerun could happen, collab reruns are few and far between. It’s safest to assume she’ll never rerun and this is your only chance to get her. I hate basing a suggestion around this since it plays into the predatory nature of the gacha, but it is what it is. However, collab banners are also highly valuable which lessens the blow a bit. Sakiko is guaranteed at “only” 120 pulls (100 out of pocket, see FAQ below). So when you total up all the factors - Sakiko being powerful, being truly limited, and being valuable - there isn’t much reason to consider skipping this banner. Even for off-meta players, the 5★s here are great!
You may be curious as to why the “Yes” is more firm here than it was on Hoshi2’s banner, despite the fact I said I liked Hoshi2 better in the previous article. There’s three reasons for this. The “true limited” nature of the collab, and the value prospect are both reasons as discussed above, but additionally here, there’s a longer gap until the next “must-pull” unit, SilverAsh the Reignfrost. It’s not a long gap still, but we’re looking at 1.5-2 months from the end of Sakiko to the start of SA2, compared to about 2 weeks from the end of Hoshi2 to the start of Sakiko (Mantra and Vina Victoria rerun are both quite skippable). This means if you burned everything on Hoshi2, there was a relatively high odds of missing Sakiko. But if you burn everything on Sakiko, your odds of getting SA2 are still decent. Even for as great as SA2 is, it really doesn’t make sense to skip Sakiko here, whereas there are ways that skipping Hoshi2 might have made sense.
However, there is a little bit of room to nitpick for those that truly don’t care about the true-limited nature of collab units (very based btw). Sakiko is really only a DPS unit. Any utility she has just expands upon her DPS, and never in a way that’s required. Further, for a DPS-only unit, she’s limited to a single target, which is rough in the modern meta. Now, to be clear, she is a super powerful carry unit for more casual players. This is a must pull banner by most measures! But if you are truly nitpicking, she does lack in ceiling compared to other recent units, which may be enough for some rare few to consider passing.
FAQ and Discussion
IMPORTANT: These next few questions may read as if I’m putting Sakiko down. They shouldn’t be read that way. As said above, she is a great unit and this is a must pull banner. The point here is instead to give some context as to why I rank her below Hoshi2 and SA2, as well as give some context to the lookaheads from prior articles.
Q: Can you expand a little bit on the “just a DPS unit” idea that’s come up a lot with Sakiko?
A: In the past (and still), DPS units have been highly valued, so it can be a bit confusing why Sakiko is often called “just a DPS unit” as if it’s a bad thing. In my opinion, this is largely a function of powercreep. The era where the best units in the game were simply the strongest DPS is well over. In fact, doing strong DPS is basically a prerequisite! Units like Tragodia, Hoshi2, and SA2 all do strong damage in addition to all their utility! When you compare Sakiko to them, she doesn’t bring as much to the table. It’s not quite fair to say she has no utility, but things like range and DEF/RES-ignore (see next question) pale in comparison to things like Lure, DP generation, and invulnerability, just to name a few. Even DPS forward units like Exu2 also bring a ton of utility in comparison. Now, of course, Sakiko’s DPS is truly crazy, and the DEF/RES-ignore is significant, but the point here really is that it isn’t the special quantity these things might have been a year or so ago. Instead, it’s “just” more DPS.
Q: Related, why don’t you value the DEF/RES-ignore more?
A: To be clear here, I like Sakiko’s DEF/RES-ignore and it does have value. It means Sakiko will almost always be doing at least decent damage no matter what happens to stat bloat. In an era of pretty intense powercreep, it’s nice to know there is a pretty high floor she’ll always maintain. However, people tend to overvalue this aspect too.
There’s a few reasons for this. First, while Operator powercreep has been pretty extreme, enemy powercreep has been much slower. Enemies are getting tougher, but they’re still broadly beatable with lower rarities. Enemies that do have extreme DEF or RES tend to have some gimmick associated with them too (although bypassing these gimmicks can have value, we’ll get more into this in a moment) and enemies that are simple stat blocks are actually pretty rare. Simply, the game design means we’re probably never going to have events where this level of DEF/RES-ignore is required.
Second, the strong DPS units already deal with this fine. These days, there’s Elemental damage, sky high DPH, strong RES-ignore, all built into units who have better control and utility too. To build onto the previous point, even when we do have stat bloat, stat bloat that units like Lemuen and Logos can’t deal with are even rarer!
Essentially, this all means that Sakiko is a great unit against a wide variety of targets, but her DEF/RES-ignore doesn’t mean she’s the only solution. It’s a great and powerful mechanic, but that itself is not why Sakiko is a great unit. Her strong base DPS, flexibility, and range are why she’s a great unit.
Now, all that said, this section is largely just a digression on some of the discourse surrounding Sakiko in the last couple of months. For a lot of players, her DEF/RES-ignore is going to be great! Why deal with the ever increasing complexity of stage gimmicks when you can just muscle through them? That’s exactly what some people will want! And for all the discussion here, I am still calling Sakiko a must pull, and her main skill has the highest grade possible in the guide. Rather, I’m hoping here to help illuminate why some of the discussion among end-game players is like it is, and why most don’t consider Sakiko to be an EX-caliber unit.
Q: How does Fever work?
A: Each of the Ave Mujica girls has a Talent which builds Fever over various triggers. Fever can build to a total of 450, as represented by the musical note they each have on the lower right corner just above their health bar, which fills with red in proportion to the total. When it’s full, if any of them manually activate a skill, they will all enter the Fever state. During this state, they continually activate their skills for free. For most skills, this is simply a free additional activation with a different duration. A few differ though. Notably for this guide, skills which are single activation such as Umiri’s S1 or Sakiko’s S1 will constantly trigger. Sakiko’s S2 and S3 have additional effects as well, especially S3 which grants them all invulnerability for the duration.
Fever can be a bit daunting at first if all you see is a highlight where the music changes and everyone starts to spaz out, but it’s actually not that complex. They build Fever over time, and get a free skill activation when triggered. It turns out to be very powerful though!
Q: How does the spark / guarantee work?
A: It’s a bit outside the scope of this writeup, but collab banners work differently than the limited banners which can catch people off guard, so taking a brief moment to discuss it might help a few people.
Basically, the 6★, Togawa Sakiko, is guaranteed on pull 120. We do NOT get the daily free pull we get on normal limited banners. Instead, we get two 10 pulls. One we get immediately, and the second we get during the second week. So this means the ideal way to get Sakiko if you have to go to the guarantee is to pull to 110 now, including the free 10 pull, then wait for week two for the second ten pull. If you can’t wait a week, you’ll have to spend 120 now, including the initial free 10 pull, and the second 10 pull will be mostly wasted.
Q: I can’t keep track of who is who!
A: Yea, the naming can be a little hard to keep track of, especially if you aren’t familiar with the source material. I’m not sure why they included their family names since it just clutters things. This guide (and most people) just refer to them by their “first” names (the second name in the full name due to how Japanese works). Anyway, there’s not a great solution to this other than getting familiar with them, but here’s a quick table anyway that may help. “Skin Race” here refers to which in-universe race they represent in their skin, which is included here since it’s a common question, even if not particularly relevant to the guide.
edit: This was written before Yostar made the official announcement, and it appears the name order will be reversed on EN. Makes this section seem a little bit pointless now, but oh well. If you’re wondering why things may be a bit inconsistent from the official announcements, that’s why.
| Unit Name | Short Name | Rarity | Archetype | Source | Skin Race |
|---|---|---|---|---|---|
| Togawa Sakiko | Sakiko | 6★ | Lord | Gacha | Sarkaz |
| Wakaba Mutsumi | Mutsumi | 5★ | Dollkeeper | Gacha | Cautus |
| Misumi Uika | Uika | 5★ | Bard | Gacha | Perro |
| Yahata Umiri | Umiri | 5★ | Ambusher | Welfare | Lupo |
| Yūtenji Nyamu | Nyamu | 5★ | Earthshaker | Welfare | Feline |
Oh and by the way, the reason they don’t use their band names as their code names is likely because of Mutsumi. Outside of the band, “Mortis” usually refers to her alter ego (i.e. the doll) so it wouldn’t make as much sense if it was her name as well.
Q: How should I handle the “promote 5★s” event?
A: NOTE: As of this article being published, this hasn’t been announced yet and many people are unaware of it. It’s an event that runs along side the collab that asks you to promote various 5★s for rewards. You can find details on it here.
This one can be daunting because it asks you to E2 four 5★s to get all the rewards, which is extremely expensive. However, don’t panic because it’s not as bad as it seems.
First, skipping it entirely is a pretty valid option. The rewards outside of the two E2 and two max level tickets are really poor, so simply not doing it isn’t a big deal.
Second, you can get most of the rewards by E1 40 SL7 four 5★s instead, which is far far cheaper. Many people will probably want to do this anyway given that there are four brand new (and popular, and pretty good except Nyamu) 5★s this patch! In fact, it can even pay for itself if you wisely spend the tickets. Going this route will get you everything except the 5★ max level ticket. E1s are not that expensive either. The total sanity value of the 4★ E2, 4★ max level, and 5★ E2 come out to be more than the cost of four E1 40 SL7 5★s!
The real cost comes in with the E2 promotions. Those are far more expensive and will only get you the 5★ max level ticket, so generally, I’d avoid going this far if you don’t know what you’re doing.
If you’d like to get the most value out of your promotion tickets, I publish a sheet of values you can find over here.
Q: How good are the 5★s? Are they must-raise units?
A: I absolutely love the 5★s this patch. They are so well designed, both in terms of flavor and value, AND they’re (mostly) powerful too! After writing so many rants over the years about the dropped balls at the rarity, this patch is everything I dream about! So yeah, raise all four of them!
OK, well maybe not that far. Sadly. For as much as I absolutely adore the 5★s this patch, I can’t call any of them must raise, although some are about as close as we’ve been in years for a non-Agent 5★. Their faction buffs as well as the Fever mechanic are really powerful that make for a great net effect, even if a large chunk of that is just making Sakiko better. It certainly wouldn’t be a mistake to raise them, and 2-3 of them are great units all on their own merits too! However, 5★s are relatively expensive when you consider the power gap to the 6★s. Especially with how powerful the average 6★ is, a full Ave Mujica team is simply not the ideal solution for those who only care about maximum power.
As for them individually, I won’t go too deep here in the FAQ (this article is already super long and I could probably write a full article on each of them), but it’s worth a quick overview of their general value.
Mutsumi is the best of them and my favorite 5★ in a long long time. She is an incredible Fever generator, has both great DPS and great bulk, plus the utility of a Dollkeeper. She even scales well with buffs! She’s just a great total package, and if you want to raise any of them, even as a Sakiko companion, she’s the best choice.
Uika isn’t far behind her though. The 5★ Bards have typically been somewhat maligned (although Heidi did find some use). Uika though raises the bar a bit through role compression that has historically been only found among the 6★s. In addition to the classic Inspiration ATK buff that they all have, she brings strong DPS and HPS of her own. She is fairly replaceable outside of Ave Mujica or niche teams though, especially considering CE is pretty easy to obtain, but can be a great alternative if her or Skadi2 don’t appeal to you as much.
Umiri is a bit trickier. She’s proven to have some decent value, but the Ambusher space is really crowded with some great units. More than Uika and Mutsumi, she is really dependent on her bandmates to excel since she can’t generate enough Fever on her own. However, she does have a big range and a powerful S1 that scales great during Fever, so can still be a viable option.
Nyamu is unfortunately the miss from the group. While her design is flavorful, she doesn’t actually do anything beyond basic (and low) DPS. Her only real value is as another body for purely Ave Mujica teams, but outside of that, she isn’t worth raising.
Q: Where are the Module thoughts?
A: This may not come as a surprise given how I’ve sort of glossed over them the last few updates, but I’ll be skipping the Modules this patch. This is already a long article and there isn’t really anything interesting to say on either the EN or CN Modules. I’d rather go work on my next coomfic (Avy x Gil). For the EN side, check Mal’s article which should go up a day or two after this one, and in the same places. For the CN side, Ente’s and Hoe’s 2nd Modules are both good, but don’t change anything. Ente’s is clearly better than her first, while Hoe’s is situationally better. Viviana’s and Rosa’s 2nds are worse than their firsts. Titi’s Module upgrades are great upgrades with her S2, but less so with her S3. Worth grabbing if you want to use her, but like her, not quite essential.
Don’t worry, I’ll still be doing the regular lookaheads though. You can find them at the end of the article in their usual place. I may go back to address the Titi patch Modules next update since Mantra’s write-up should be pretty short. But I also might take this as a chance to just stop doing the Module write-ups… Or maybe go back to my original vision of just writing about the ones that catch my interest.
Q: Any thoughts on Ave Mujica or the collab itself?
A: No one is really going to ask this, but I like to yap, so here I go yappin’ again.
After the collab came out on CN, I took the time to watch both MyGO and Ave Mujica. I had never watched any Bang Dream stuff before and boy, I was not impressed. The plots are just driven around teenage girls being dramatic and none of the characters are especially interesting or likeable. The second half of Ave Mujica is especially bad and incredibly disjointed.
But if you’re a big Ave fan and are worried I’m here just to dunk on your show, worry not. I didn’t bring up this digression just to shit on your bad taste in anime! Instead, I bring it up because, despite that, I absolutely love this collab. The fact that most of the game’s collabs are just random shit Lowlight finds interesting adds so much soul to the game. Then he kicks it up a notch by writing the closure the characters all badly needed? Honestly, it’s based as hell. I’d do the exact same thing if I was in charge of a game like this and I hope we see more of it, even if it’s for a property I don’t care at all for.
The fact the 5★s are mostly really good helps too I guess… Though the fact there’s 90 OP of skins just to make them fit in thematically does sour things a bit. Oh well. At the end of the day, even if Lowlight is based, this is still a gacha game.
Masteries for Somniloquium Serenum
Sakiko Togawa

Skill
Mastery
Story
Advanced
Crescent Moon Echoes
- Manual TriggerOffensive Recovery
Mastery
Story
Advanced
S3M3
Breakpoint
S++
S++
Full Moon Masquerade
- Manual TriggerOffensive Recovery
Mastery
Story
Advanced
S2M3
A
A-
New Moon Awakening
- Manual TriggerOffensive Recovery
Mastery
Story
Advanced
S1M3
C
C+
Sakiko is a flavorful iteration of the Lord archetype. She can do both Physical and Arts damage through her different instruments; her organ is Arts damage, while her piano is Physical damage, and which is played depends on her skill. But she’s more than just flavor. At base, her DPS is already great, but then she gets some very strong DEF/RES-ignore to go with it, allowing her to do good damage against a huge variety of targets. That, along with the powerful Fever mechanic and big range, especially when paired with her bandmates¹, makes her an incredibly powerful DPS unit. However, she is stuck with ST damage, and she does lack in utility compared to other top-tier meta units, so she isn’t necessarily the pinnacle of DPS units either.
While Sakiko has three strong skills, her S3 stands out far above as the best choice for Mastery. It’s the skill that gives her most of her highly vaunted value; incredible DPS along with incredible DEF/RES-ignore and range, plus the band-wide invulnerability. Mastery on it is well above average too. The large ATK gain over Mastery gets shared over four notes, and the effect of the higher DPH on the Physical side, along with her DEF-ignore, greatly extends the range of enemy DEF she can deal with.
It’s a bit more subtle, but the improvement to her initial wind-up is also very valuable. Because her skills are tied to her continuous attacks, the charge rate is actually influenced by the Lord 1.3s interval rather than the default auto rate of 1 SP/s. This means at S3SL7, her initial SP cost is effectively 20.8² seconds, which is rather long! Instead, at S3M3, it becomes 10.4², which is a pretty drastic improvement in addition to above average damage gains.
Despite the general complexity of her kit, S3 is a fairly straight forward Mastery. It’s a strong DPS skill, with strong Mastery gains, on one of the strongest DPS units in the game!
However, while Sakiko has some incredible ceiling with her S3, it does have a long downtime and she is a strong hands-off unit too, which makes her S2 a reasonable secondary Mastery. It lacks the ceiling of her S3, so isn’t quite a mandatory-tier of Mastery, but will be useful to a variety of people. While using it, she can swap between Arts or Physical notes, and will persistently keep the appropriate buff depending on which she is using, which makes for some strong passive DPS that she can toggle at will. It has similarly strong gains as well, particularly on the Physical side for the same reasons as her S3, although the gains on the Arts side are oddly below average and lag the overall value a bit.
Since it will be a question many people ask, especially given her S2’s value in the low-step niche, it’s worth a quick discussion about the value of her burst skill (S3) vs her primary AFK skill (S2). Long time readers of the guide won’t be surprised about this topic, and some may be rolling their eyes about now, but Sakiko is a case where the value difference is drastic. To be clear, her S2 is still a good skill that is generally worth Mastery, but S3 is simply the better skill with the better gains. Her S3 has twice the DPS, twice the range, more DEF/RES-ignore (due to more notes being on the field), and even has the better Fever mechanic. And while both skills have generally strong gains, S3’s are higher due to the Arts half of her S2 being a bit below average. That said, Sakiko is a strong enough unit that even solely using her S2 would no doubt still make her quite functional, but I would encourage you to not be afraid of pressing skill buttons now and then! By the same reasoning, Sakiko is so strong that you’re missing out on a whole level of ceiling by avoiding it!
Oddly, Sakiko actually has two AFK skills, but her S1 comes up last in priority. It is ultimately lower DPS than her S2 in most cases, and while it can flex to some more immediate burst, it’s not usually enough of a difference to matter. However, it does have special value when paired with her bandmate, Umiri. Umiri’s S1 will get a free trigger any time a band member activates a skill, and Sakiko’s S1’s auto-triggers count. The net DPS is still comparable to her S2 alone, but she gains range and control through Umiri, so the combo can be valuable if you plan to run Sakiko with her bandmates. But while they are strong, her bandmates are quite a bit less meta, so her S1 is still a luxury Mastery.
Finally, it’s worth a quick note that Offensive Recovery skills are typically considered a downside in the rest of this guide. However, Sakiko’s Talent 1 makes her continuously attack even if no enemies are in range, which negates this downside.
¹ Her bandmates are not required for Sakiko to be a top-tier unit.
² Due to frame rounding, it’s actually shorter than this, but the simplified view is more appropriate for this guide.
Mutsumi Wakaba

Skill
Mastery
Story
Advanced
Destruction and Renewal
- Manual TriggerPer Second Recovery
Mastery
Story
Advanced
S2M3
A
A
Belua Multorum es Capitums
- Manual TriggerPer Second Recovery
Mastery
Story
Advanced
S1M3
None
C
Dollkeepers are one of the natively good archetypes, so Mutsumi’s doll gives her a lot of inherent value already, but then she ramps it up further with some pretty serious upside. She is the best Fever generator, her Talent gives her some pretty extreme bulk¹, and she does some pretty strong DPS! While her rarity ultimately means she isn’t a must-raise (neither the bulk or DPS compares to a meta 6★), she’s one of the better possible options if you’re looking to expand beyond top-meta units.
If she interests you, both of her skills are potential options since they fill different roles, but her S2, the DPS skill, is pretty significantly the better choice. While the DPS skill will usually win by default anyway, Mutsumi’s is extremely strong for a 5★, and also has some extremely strong gains which makes the choice easy. Since the skill hits three times, Mutsumi gains more out of the damage increase than you might expect. It gives her some of the best DPS of the rarity, only held back by a bit of RNG. Then further, it’s extremely buff receptive, and the minor self-damage even acts as additional Fever generation!
Meanwhile, her S1 is a really interesting skill that Ave Mujica hyper fans and bunny enthusiasts might find interesting, but doesn’t have much practical value. Maintaining the skill effect through her doll is a pretty cool thing and in some cases, she can be near unkillable while still blocking. The main flaw though is that after the initial doll recovery, she has no additional bulk for the 20 SP cost, meaning she can’t often be used as a consistent tank. If she can survive the 20 seconds without skill, the threat probably wasn’t that serious and wouldn’t put her in doll form in the first place, and if she can’t, she’ll just leak on the second doll swap instead. Still, for as bulky as she is as a 5★ and as a Specialist, that may be useful for some people.
¹ It’s beyond the scope of this guide, but I like this wonderful schizo-bunny enough to briefly comment on the Necrosis here. The doll swap does not reset the build up, but it builds fairly slowly and in many cases will be completely negligible. She does not need a Wandering Medic babysitting her! In fact, it can even be a benefit to trigger it at times because the resulting damage will further trigger her Fever gain.
Uika Misumi

Skill
Mastery
Story
Advanced
Paeniteo Ergo
- Manual TriggerPer Second Recovery
Mastery
Story
Advanced
S2M3
B
B+
Cogito Ergo
- Manual TriggerPer Second Recovery
Mastery
Story
Advanced
S1M3
None
None
Uika is our newest Push Stro-, err I mean our newest Bard. Bards in general can be tricky to evaluate. Inspiration as a buff is unusual in its considerations already, but then there’s two easily obtainable 6★s to consider, and they don’t stack. Uika though mixes that up because in addition to the basic Inspiration buffing, she brings some fairly strong healing and damage of her own. This makes her a strong unit who will tend to have more value than her fellow 5★s. Although being in a support role with the competition from the 6★s means she isn’t a general meta consideration either.
Both of her skills can be viable options for Mastery, although in most cases, her S2 is the better skill which has that extra healing and damage. Her DPS and HPS while using it are really high for her rarity. The damage is higher than many supposed 5★ DPS units even, albeit randomly spread out. Mastery on it is fairly strong too, with a 25% improvement to both DPS and HPS, the Inspiration improvement, and a noticeable gain to initial wind-up. The only downside is the relatively poor uptime, so she does tend to favor more Advanced playstyles.
Meanwhile, her S1 can have some value for maximalists. It has better duration and range than her S2 along with some DEF inspiration. However, it’s more akin to the typical 5★ Bard skill, meaning it’s a lot less generally useful. It’s mostly a skill for people who will want to use Uika no matter what, or for heavier niche players. Don’t be fooled by the uptime difference compared to her S2 though. While it is a notable difference that can matter at times, the impact of S1 is a lot lower.
Umiri Yahata

Skill
Mastery
Story
Advanced
Shuddering Strings
- Manual TriggerOffensive Recovery
Mastery
Story
Advanced
S1M3
Breakpoint
B-
B-
Drifting Soul
- Manual TriggerPer Second Recovery
Mastery
Story
Advanced
S2M3
None
None
Texas3 is our first double alt- Wait, a black-haired Lupo ice-queen with mob ties isn’t Texas? I find it so funny that when all these teenage girls got isekai’d to Terra, Umiri decided to just become a mob enforcer. After watching the anime, I am not at all surprised either. It’s a great fit personality-wise! It’s also the only way that it really makes sense she’s an Ambusher, but I suppose that’s not a matter we need to get bogged down about here.
At any rate, Umiri is a pretty decent iteration of the archetype, which may be mildly surprising since her effective cycles are pretty long. While she definitely doesn’t stack up to the 6★ Ambushers, she’s got enough going for her to be viable, particularly an up-sized range. However, unlike her more meta bandmates (Sakiko, Uika, and Mutsumi) who can function well on their own, Umiri is a bit more reliant on the others. Her personal Fever generation is negligible, and without Fever, her S1 looks less impressive.
Speaking of, S1 is her main skill, however outside of the S1M1 breakpoint, it has incredibly low value Masteries, which accounts for her grades being much lower than her unit value. On the matters of the skill, it has a very long effective cycle (4 SP * 3.5s interval = 14 seconds for one activation, bit less with Module), however it’s saved by the fact it’s a Charge Based Manual Activation. This means even without Sakiko, it can be very effective since it can be easily timed to maximum effect, which mitigates the impact of the long cycle. She can place control and good damage on demand for maximum effect.
It has some further special value when paired with Sakiko’s S1 as well. The additional trigger will happen every time Sakiko’s S1 auto triggers which makes for a strong hands-off effect. However, before pursuing, keep in mind that Sakiko’s S2 is her better AFK skill, so this actually doesn’t add much value, but in any case, it’s her stronger skill even without it.
Finally, it’s notable that during Fever, her S1 continually activates which can be quite valuable, although, as mentioned, she’ll have trouble ever triggering Fever without the other girls. If, for some reason, you don’t intend to raise any of them, you should likely treat Umiri a bit lower in priority.
You could consider her S2 as well. In fact, it has the better gains by far, however the overall impact of the skill is also much lower. The uptime on the skill is incredibly poor (40s down for 15s up). which also greatly devalues the Fear (1.5 seconds of Fear per 55 seconds)! The DPS isn’t especially good either. It just does too little for the cost, although the effects have given it a small handful of niche clears if you’re a big maximalist.
Nyamu Yūtenji

Skill
Mastery
Story
Advanced
As Strong As Wheat
- Manual TriggerOffensive Recovery
Mastery
Story
Advanced
S2M3
None
None
As Fierce As Flame
- Manual TriggerOffensive Recovery
Mastery
Story
Advanced
S1M3
None
None
Nyamu’s design is very cool and thematic. Her attacks literally become a drum line! That fits so well for an Earthshaker! That might make her the most thematic unit in a really well designed patch overall! So it’s a damn shame she’s the worst of the Ave Mujica girls by a longshot. While all the others are quite strong units, Nyamu just isn’t. She only does DPS, and not even particularly good DPS, on top of low DPH. Even in purely Ave Mujica teams, she only really exists as a blocker and Fever battery. Such a waste of a great idea…
If you want to raise Nyamu anyway (at least she’s the most mentally stable of them, sorta), go with her S2 for Mastery, although the gains on it are also notably poor. While both of her skills do similarly little, S2 has the higher DPS between them. Pretty simply, two hits for 125% (S2M3) are better than one for 160% (S1M3). Although S1 does have the higher DPH, it’s not enough higher to really matter. Additionally, with S2, she compresses 8 hits into the same interval which makes for a more reliable application of her Fragile.
Meanwhile, her S1 will only have value to true maximalists. As mentioned, it does have a higher DPH. In most cases that won’t matter, but it can in rare cases if you’re purposefully using Nyamu all the time. It cycles faster too which can also situationally matter. However, the DPS is quite a bit lower, so there isn’t a lot of general value to be had.
It’s worth a quick note that Offensive Recovery skills are typically considered a downside in the rest of this guide. However, Nyamu’s Talent 1 makes her continuously attack even if no enemies are in range, which negates this downside.
Pull Priority
Feb update: There are three changes this update. First, Sakiko is moved up to “must pull”. This isn’t a change in opinion, but rather reflects the fact Hoshiguma the Breacher is no longer on the list, which gives some more top end space. Second, Titi is added. She’s at lean skip for now, but I think she could maybe end up higher as we get closer, depending how the CNY banner looks. Third, Thorns the Lodestar rerun is added in at strong skip. I really like him as a unit, but the last year of powercreep hasn’t been kind and he definitely seems like a luxury now.
Strong Pull: Togawa Sakiko (collab), SilverAsh the Reignfrost (limited)
Lean Pull: Pramanix the Prerita
Lean Skip: Mantra, Titi
Strong Skip: Vina Victoria (rerun), Nasti, Thorns the Lodestar (rerun)
Meta-value 4-5★s: None
Niche-value 4-5★s: Wakaba Mutsumi, Misumi Uika, Yahata Umiri
Pull Priority Blurbs
SilverAsh the Reignfrost - He’ll greatly raise the ceiling of any team he’s on and is the sort who will be tough to powercreep. He does the basic Vanguard job (dog blocking champion) super well already but then doubles it up with really strong damage that scales with your team. He’s just so valuable from top to bottom, and will probably be a meta option for a long long time.
Togawa Sakiko - Incredible damage and range with a huge amount of DEF/RES ignore allowing her to do good damage to almost any target. However, she has no utility beyond damage so is fairly replaceable.
Pramanix the Prerita - She’s the new queen of AFK gaming with plenty of ceiling too. Great damage and a huge Slow field, plus the Phalanx bulk. The Kjerag faction is quite strong in IS too thanks to Gnosis’ IS Module which gives her a lot of additional value. The only thing really holding her back from being a Strong Pull is the fact she’s not a limited! In fact, next update after Sakiko, there’s a good chance she goes up to Strong with her brother unless the CNY banner is truly nutty.
Mantra - Very powerful in some situations, less so in others. She can do a lot of Elemental Damage at once, but it requires a lot of setup that isn’t always viable. She’s a decent unit overall, but compared to the other DPS units, isn’t quite as versatile and her control is mostly redundant to Tragodia.
Titi - She has some pretty strong utility, but ultimately Sleep is one of the weaker forms of control. While she’s still pretty powerful, she’s ultimately a bit too situational.
Nasti - A fun unit that can break some stages, and best friends to Ifrit and Pram2, that also doubles as a strong SP battery, but ultimately a bit too gimmicky. Game design dictates that her tile gimmick will never be required.
Vina Victoria - Vina is relevant at times due to the strength of True Damage, but she’s much more clunky than the others. While still decently strong, she’s by far the most situational of the upcoming banners, and the last year of powercreep has made her less valuable too.
Thorns the Lodestar - Thorns2 has some really quality DPS. It’s pretty high, on a huge uptime, huge range, and huge hit count. However, there’s a lot of DPS these days too and while strong, it’s not as strong as a lot of more recent units. His utility is also really clunky which limits his lateral use.
Lookaheads
All lookaheads can be found in their usual spot on the main guide here.
Titi
Can I just say I love that her name is so complex that it was shortened for her code name? As someone who fumbles names really badly, it saves me a lot of headache. In any case, Titi is a solid unit with decent DPS and control, along with some strong utility, but is ultimately too situational to measure up to the high-tier meta we’ve gotten used to. Like Nasti before her, her utility can be amazing, such as against IS#6 ED2. Her S2 on demand friendly Sleep makes allies invulnerable. But it is map dependent. Most stages don’t have a recurring insta-kill to dodge! Further, she’s entirely reliant on Sleep, which means she’ll be useless against most bosses. Sleep also doesn’t play well with most other Operators which can make her clunky to use at times, a situation made worse by the fact most existing Sleep centric OPs are now on the older side, and thus pretty ineffectual by modern standards. And finally, she’ll be right before a limited banner. As of this writing, we don’t know how strong it will be, but it’s fairly safe to assume most people will want to skip Titi for that.
If you want to roll for her anyway, both S2 and S3 will be decently graded Masteries and the split will probably come down to usage. S2 will likely have the higher Advanced grade. It gives her that on-demand invulnerability, along with fast cycling control that pairs well with Tragodia S2 stalls (barring Sleep-immunity of course). Masteries also represent a huge DPS increase on it as well, particularly if you plan to get her Module, along with significant improvements to her SP cost. S3 meanwhile is a more typical burst skill that will play nicer for day-to-day Story usage, and is particularly great at dealing with crowds. Given her S2 can be troublesome to optimize for some players, S3 may be the preference for some. However, it has worse gains and a generally lower ceiling. Pass on her S1 which is oddly useless filler. It cycles incredibly poorly, has bad damage, and RNG on the control.
tl;dr Decently graded M6. For Advanced, S2 > S3. For Story, S3 > S2. But fairly close in either case (and could change by release). Avoid S1.
Perfumer the Distilled
Oh boy, another 5★ Abjurer. I’m not sure why HG is so fond of this archetype. They generally need a lot of help to not be absolute dogshit too. While I’m salty about this in general, Perfumer2 is actually moderately interesting. The toggle nature of Abjurer’s is a huge flaw, and Quercus and Haruka have already well tread the infinite-duration “fix”, so it’s notable that Perfumer2 does it differently. She has an on-deploy skill instead, which means she starts as a helidrop healer with good effective-HPS thanks to the Sanctuary. Of course, this comes at the expense of an extremely long cycle time since she needs to be redeployed, but she’s at least effective enough during the uptime. This all places her significantly above the basement dwelling Abjurer’s, but not anywhere close to Quercus either, so she’ll ultimately be a luxury or niche-tier unit. In such a case, S2 will be her main skill and has some pretty strong Mastery gains too. Her S1 is probably a pass. While the premise is a good one, Auto-Activation makes it unreliable, but the strong healing and DEF buff may have some value in niches.
tl;dr S2 C-tier > S1 low C-tier or ungraded.
Varkáris
Varkáris is a Centurion, which means he’s usable by default. It’s a pretty crowded space though, and home to some pretty powerful units, and they also really need E2 which can be limiting by modern standards (worse for newbies, harder to use in IS). His sustain and Barrier gimmick is actually quite useful, and he’ll be a great unit for non-6★ niches, but it all ultimately means he isn’t a general consideration. He’s too expensive to be a starter unit, and not strong enough at the high-end. However, if you’re a niche player or just think he’s cool (and he is super cool), his S2 is a strong Mastery. While 1% may appear small, for the skill duration it can total around 7.5k HP, which is never wasted due to the Barrier, making it quite valuable. Pass on his S1 unless you’re a simp though. It has some decent DPS, but has none of his sustain that actually makes him useful.
tl;dr S2 B or C-tier. Pass on S1.
TacticalBreakfast
Writer for the now dead GamePress Arknights wiki, best known for his Mastery Priority Guide.